By Ian Milligan
Do you have a unique collection in your basement that you wish you could share with others? An amazing shrine to your favourite sports team? A unique mason jar collection? Some military memorabilia? What if you could take pictures, catalogue it, and suddenly have a website that’s the equal of many professional museum websites? You can do that, and I want to show you how.
Establishing a web presence used to be tough, but with the advent of Content Management Systems (CMS) it can be easy (ActiveHistory.ca runs on WordPress, which means our editors don’t have to concern themselves with the acronym soup of HTML, CSS, etc.). These platforms have the power to put publishing tools into your hands, letting you share your ideas, visions, or historical object collections with family, friends, and anybody out there on the internet. In this post, I want to introduce you to a truly unique CMS: Omeka. I’ll provide a quick snapshot of what Omeka can do, before showing you how to set up your very own site.
So what can Omeka do?
When I’m trying to sell people on Omeka, I take them to the Canadian Lesbian and Gay Archives gallery website, or the Portuguese Canadian History Project. The CLGA has a digital collections site running on Omeka (screenshot at right). You can navigate various collections, items, newspaper clippings, and so forth. One can almost choose your own adventure, through the various tags: are you interested in buttons? Badges? Pins? A serious topic like AIDS prevention? Toronto? Or maybe even Kitchener (where I’m writing this from)? Each location is geo-tagged, and you can find 79 items there. Even more usefully, there are several collections that you can find, from Lesbian Pulp to Buttons. These are curated collections of those items.
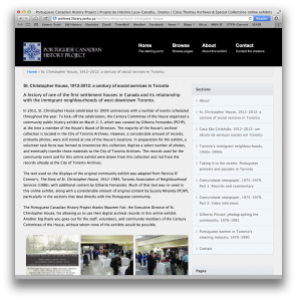
The Portuguese Canadian History Project is even more sophisticated, with featured images, exhibits, and a fantastic grassroots approach to history. They read like short books, engaging, replete with illustrations, commentary, and so forth. The “St. Christopher House, 1912-2012” exhibit is particularly worth exploring.
Pretty cool, eh? How do I set this up?
There are two ways to set up an Omeka server: you can set it up yourself on your own server, or you can set it up on their hosted server. This is similar to WordPress, which was WordPress.org (setting it up yourself) or WordPress.com (letting them host it). The documentation is quite good for setting it up, or if you’re fortunate enough to work in an institution with an amenable IT team (like UW – shout out to Arts Computing!), feel free to ask them to help you out with this.
But if you don’t want to set up your own server, pop over to Omeka.net.
Step One: Set it Up

The Omeka.Net dashboard. That ‘manage site’ icon beneath your site is going to be your command centre.
From Omeka.net, click on the big red ‘sign up’ button (you can’t miss it). You’ll notice that there are tiers of pricing, based on the amount of storage, sites, plugins, themes and so forth that you need. When you’re trying things out, however, there is a free basic plan available at the bottom. Click on it and ‘choose.’ Fill out your basic information: username, password, name, e-mail, etc.
Then you’ll have your site set up. At left, this is what the dashboard looks like. You can click ‘view site’ to view your site, or ‘manage site’ to get into the nitty gritty of collections, appearances, exhibits, and so forth.
Let’s add an item!
Step Two: Add an Item

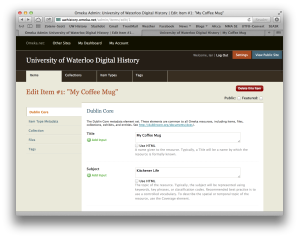
Editing your very first item. Pay attention to the five tabs on the left hand side, as they’ll help you add pictures, tags, and so forth.
From ‘Manage Site’, you’ll see your big menu of items to choose. Let’s ‘Add a new item to your archive.’ Here, you can create an item. Omeka uses a metadata (roughly the “data about data”) framework known as Dublin Core. Dublin Core is a set of terms that you can use to describe an item: from a video clip, to a mug of coffee. This standardized information is compatible across sites, platforms, and so forth, and comes with great documentation to get you started.
So you’ll pick a title, the subject (try to think of a set of standardized subjects for your site), a description, creator, source, and so on and so on. The information beneath each field will give you a really good idea of what to do. Fill it out as best you can.
This part can be a bit tricky. At left, you’ll see that you’re working in the ‘Dublin Core’ tab. At left are a series of five tabs: Dublin Core, Item Type Metadata, Collection, Files, and Tags. For the collection tab, if you had set up a collection, you could assign it to it. For Files, you can upload a picture. And for Tags, assign a tag.

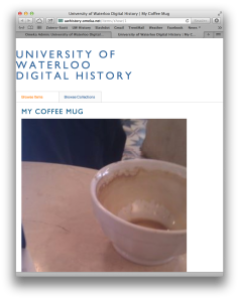
My first item… the latte I consumed while writing this post (it had a beautiful leaf on top, but you’ll have to trust me on that).
Now you’ve got your first item set up!
Step Three: Exploring Other Features
The next few steps should come together quickly. Above the edit item stage, you should see a ‘collections’ tab (this is also found in the ‘Manage Site’ home page). From there, you can add a ‘collection.’ You could then, from the item pages, begin to catalogue your items into various collections.
You can then also browse the different item types (above, next to collections), of which twelve are provided by default with descriptions (i.e. “document: A resource containing textual data. Note that facsimiles or images of texts are still of the genre text). You might be happy with these, or you might want to set up your own.
You can also set up tags, and browse these. Tags can be unwieldy, so try to make sure you don’t use too many (something that ActiveHistory.ca is probably guilty of).
Step Four: Have Fun!
Hopefully you’re now on the path to creating your own collections. Public History, more than ever before, is truly in your own hands. The web can be a fun place, as can the past, so hopefully you have wonderful adventures ahead of you.
Ian Milligan is an assistant professor in the Department of History at the University of Waterloo.


This work is licensed under a Creative Commons Attribution-NoDerivatives 4.0 International License. Blog posts published before October 28, 2018 are licensed with a Creative Commons Attribution-NonCommercial-ShareAlike 2.5 Canada License.